
10 Simple Ways To Speed Up & Optimize PCB Troubleshooting
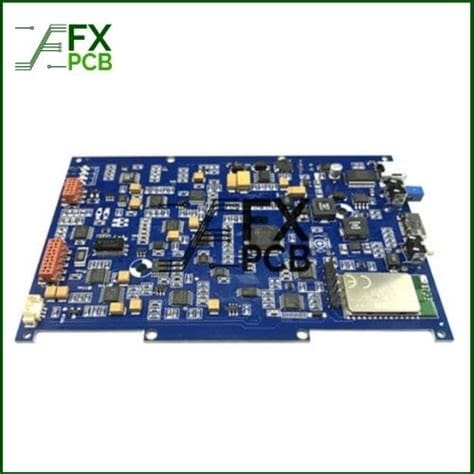
1. Start with a Visual Inspection
Before diving into more advanced troubleshooting methods, always begin with a thorough visual inspection of the PCB. This simple step can help you quickly identify obvious issues, such as:
- Damaged components
- Incorrect component placement
- Solder bridges or cold solder joints
- Burned or discolored areas
- Loose or broken connections
Use a magnifying glass or microscope to examine the PCB closely, paying special attention to high-stress areas and power-dense regions. Make note of any anomalies you discover, as they may provide valuable clues for further investigation.
2. Utilize Schematic Diagrams and Board Layout Files
Having access to accurate and up-to-date schematic diagrams and board layout files can greatly simplify the troubleshooting process. These documents provide a clear overview of the PCB’s design, making it easier to:
- Trace signal paths
- Identify components and their connections
- Understand the intended functionality of the circuit
When troubleshooting, reference these documents frequently to ensure that the PCB matches the intended design. If discrepancies are found, update the documents accordingly to maintain accuracy for future reference.

3. Employ Divide-and-Conquer Techniques
When faced with a complex PCB issue, it can be overwhelming to tackle the entire problem at once. Instead, employ a divide-and-conquer approach by breaking the problem down into smaller, more manageable parts. This can be achieved by:
- Isolating specific sections of the PCB
- Focusing on individual subsystems or functional blocks
- Testing components or circuits independently
By systematically narrowing down the scope of the problem, you can more easily identify the root cause and develop targeted solutions.

4. Make Use of Diagnostic Tools
There are numerous diagnostic tools available that can greatly assist in PCB Troubleshooting. Some essential tools include:
| Tool | Purpose |
|---|---|
| Multimeter | Measure voltage, current, resistance, and continuity |
| Oscilloscope | Visualize and analyze signal waveforms and timing |
| Logic Analyzer | Capture and interpret digital signals and bus transactions |
| Thermal Imaging Camera | Identify hot spots and temperature anomalies on the PCB |
| In-Circuit Emulator (ICE) | Debug and test firmware/software on the target PCB |
Invest in high-quality diagnostic tools and learn to use them effectively. They can provide valuable insights into the PCB’s behavior and help you pinpoint issues more quickly.

5. Conduct Power Analysis
Many PCB issues can be traced back to power-related problems. Conduct a thorough power analysis to ensure that the PCB is receiving the correct voltage levels and current at all critical points. This can involve:
- Measuring voltage levels at power input and distribution points
- Checking for voltage drops across key components
- Verifying that power sequencing is correct
- Analyzing power supply ripple and noise
Use a multimeter or oscilloscope to perform these measurements, and compare the results against the PCB’s specifications. If discrepancies are found, investigate further to identify the cause (e.g., faulty voltage regulator, inadequate power supply, etc.).
6. Perform Signal Integrity Analysis
Signal integrity issues can lead to a wide range of PCB problems, from intermittent failures to complete malfunction. To optimize your troubleshooting efforts, perform a signal integrity analysis on critical signal paths. This can involve:
- Examining signal waveforms for distortion, ringing, or reflections
- Checking for proper termination and impedance matching
- Verifying that signal levels are within specified tolerances
- Analyzing crosstalk between adjacent signals
Use an oscilloscope or logic analyzer to capture and interpret signal waveforms. If issues are identified, consider modifications to the PCB layout, such as adjusting trace routing, adding ground planes, or implementing better shielding.
7. Leverage Boundary Scan Testing
Boundary scan testing, also known as JTAG testing, is a powerful technique for troubleshooting PCBs with complex digital circuits. This method involves using dedicated test access ports (TAPs) to control and observe the state of individual pins on boundary scan-enabled devices. Boundary scan testing allows you to:
- Verify connectivity between devices
- Identify short circuits or open connections
- Test device functionality without physical access
- Program or update firmware on the target devices
To implement boundary scan testing, you’ll need a JTAG controller and compatible software. Many PCB design tools include built-in support for generating boundary scan test patterns and analyzing results.
8. Collaborate with Colleagues and Experts
Don’t hesitate to reach out to colleagues or experts when faced with particularly challenging PCB issues. Collaboration can provide fresh perspectives, insights, and expertise that can help speed up the troubleshooting process. Consider:
- Discussing the problem with experienced PCB designers or engineers
- Posting questions on online forums or communities dedicated to PCB design and troubleshooting
- Contacting the component manufacturers for technical support or guidance
- Engaging with professional PCB troubleshooting services for complex issues
By leveraging the knowledge and experience of others, you can tap into a wealth of information and potentially find solutions more quickly.
9. Document and Learn from Each Troubleshooting Experience
As you work through PCB troubleshooting tasks, make a habit of documenting your findings, solutions, and lessons learned. This documentation can serve as a valuable reference for future troubleshooting efforts, helping you avoid repeating the same mistakes or rediscovering the same solutions. Consider:
- Creating a centralized knowledge base or wiki for storing troubleshooting documentation
- Sharing your experiences and insights with colleagues through presentations or written reports
- Incorporating lessons learned into future PCB designs to prevent similar issues from recurring
By continuously learning from each troubleshooting experience, you can improve your skills and efficiency over time.
10. Invest in Ongoing Training and Education
Finally, to optimize your PCB troubleshooting skills, invest in ongoing training and education. As PCB technologies and best practices evolve, it’s essential to stay up-to-date with the latest techniques and tools. Consider:
- Attending workshops, seminars, or conferences focused on PCB design and troubleshooting
- Pursuing online courses or certifications related to PCB engineering
- Reading industry publications, blogs, and whitepapers to stay informed about new developments
- Participating in webinars or online discussions hosted by PCB design tool vendors or industry experts
By continually expanding your knowledge and skills, you’ll be better equipped to tackle even the most challenging PCB troubleshooting tasks.
FAQ
- What are some common causes of PCB failures?
Common causes of PCB failures include: - Manufacturing defects (e.g., incorrect component placement, solder issues)
- Environmental factors (e.g., extreme temperatures, humidity, vibration)
- Power-related issues (e.g., voltage spikes, insufficient power delivery)
- Signal integrity problems (e.g., crosstalk, reflections, noise)
-
Component failures (e.g., faulty ICs, capacitors, or connectors)
-
How can I prevent PCB issues from occurring in the first place?
To prevent PCB issues, consider: - Conducting thorough design reviews to identify and address potential problems early
- Following best practices for PCB layout and routing (e.g., proper grounding, signal isolation)
- Selecting high-quality, reliable components from reputable suppliers
- Implementing robust testing and quality control processes during manufacturing
-
Designing for manufacturability and testability to simplify troubleshooting efforts
-
What should I do if I can’t identify the root cause of a PCB issue?
If you’re unable to identify the root cause of a PCB issue, try: - Reviewing the schematic and board layout files for any discrepancies or design errors
- Consulting with colleagues or experts who may have encountered similar issues
- Performing additional diagnostic tests or measurements to gather more data
- Comparing the faulty PCB to a known-good reference board to identify differences
-
Considering the possibility of intermittent or environmental factors contributing to the issue
-
How can I minimize the impact of PCB troubleshooting on project timelines?
To minimize the impact of PCB troubleshooting on project timelines: - Prioritize troubleshooting efforts based on the severity and impact of each issue
- Allocate sufficient time and resources for troubleshooting in project schedules
- Establish clear communication channels with stakeholders to provide regular updates
- Document troubleshooting processes and solutions for future reference and efficiency
-
Continuously improve your troubleshooting skills and knowledge to work more efficiently
-
What resources are available for learning more about PCB troubleshooting?
There are numerous resources available for learning about PCB troubleshooting, including: - Online courses and tutorials offered by PCB design tool vendors and educational platforms
- Industry conferences, workshops, and seminars focused on PCB design and troubleshooting
- Technical books, whitepapers, and application notes published by industry experts
- Online forums, communities, and social media groups dedicated to PCB design and troubleshooting
- Professional associations and organizations, such as the IPC (Association Connecting Electronics Industries)
By leveraging these resources and continually expanding your knowledge, you can become a more effective and efficient PCB troubleshooter.
In conclusion, optimizing your PCB troubleshooting process involves a combination of strategies, tools, and continuous learning. By following the 10 simple techniques outlined in this article, you can streamline your troubleshooting efforts, identify issues more quickly, and ultimately, minimize the impact of PCB problems on your projects. Remember to stay proactive, collaborate with others, and continuously refine your skills to become a master PCB troubleshooter.