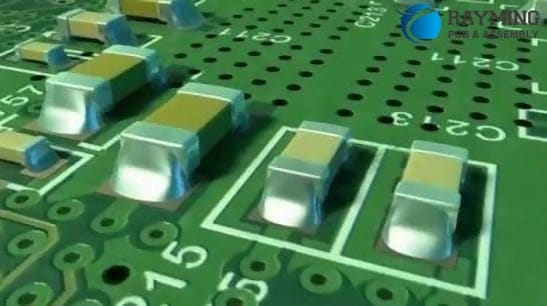
The printed circuit board (PCB) serves as the foundation for almost every electronic device, providing mechanical support and electrical connections between components. As products become more complex and require greater functionality, multilayer PCBs with two or more conductive copper layers have become increasingly common. Multilayer boards allow for more intricate circuit designs, higher component density, shorter trace lengths, and reduced noise compared to single or double-sided boards. However, fabricating multilayer PCBs requires specialized manufacturing techniques and processes to ensure quality and reliability. This guide provides an in-depth look at multilayer PCB manufacturing.
Overview of the Multilayer PCB Fabrication Process
The basic fabrication process for multilayer PCBs typically involves the following key steps:
1. Design and Layout
- The board layout is designed in CAD software, specifying trace routing, layer stackup, drilling locations, etc.
- The Gerber files are generated for use in PCB fabrication.
2. Materials Preparation
- Base materials like FR-4 glass epoxy laminate and copper foil are prepared.
- Materials for other layers like prepregs and bondplys are also readied.
3. Laminate Production
- Individual layers are fabricated by coating copper foil onto substrate material.
- Holes are drilled and plated to form vias between layers.
- Layers are aligned, stacked, and laminated under heat and pressure.
4. Imaging and Etching
- Photoresist is applied and the traces are imaged onto each copper layer.
- The copper is chemically etched away to form the isolate traces.
5. Testing and Finishing
- Boards are electrically tested for shorts, opens, impedance, etc.
- Appropriate surface finishes like ENIG or Immersion Silver are applied.
6. Solder Mask and Legend
- Solder mask is applied to protect exposed copper from oxidation.
- Silkscreen legend printing identifies components, text, and markings.
7. Final Testing and Delivery
- Electrical testing validates finished board performance.
- Completed PCBs are shipped to customers.
Proper execution of each manufacturing step is critical for producing a reliable, high-performing multilayer board. We’ll now examine some of the key processes in more detail.
Multilayer Stackup Design
The layer stackup defines the sequence and thickness of each conductive copper and dielectric insulation layer in the PCB. Proper stackup design is crucial for controlling parameters like impedance, crosstalk, and signal integrity. Key factors to consider include:
- Number of layers – More layers allow higher routing density but increase cost. 4-16 layers are typical.
- Core thickness – Thicker cores provide better mechanical rigidity. Common options are 0.8mm, 1.0mm, 1.2mm, etc.
- Prepreg/bondply thickness – Thinner dielectric layers reduce separation between conductors. Typical prepregs are 0.1-0.2mm.
- Copper weight – Heavier copper provides better current capacity. Common weights are 1/2 oz, 1 oz, and 2 oz.
- Dielectric materials – FR-4 glass epoxy is standard. High-frequency designs may use PTFE or ceramic-filled materials.
- Layer sequence – Power and ground layers typically go in the middle, with signal layers on the outside.
- Impedance control – Matching trace geometry and dielectric materials controls impedance for high-speed signals.
- Signal integrity – Minimizing discontinuities, crosstalk, reflections is key for high-frequency performance.
Proper stackup design requires balancing many interrelated electrical, mechanical, and manufacturing factors. Simulation, prototyping, and testing help validate the design.
Lamination Process
Lamination presses and bonds the stacked material layers together to form a unified board structure. The key steps involved in multilayer lamination include:
Surface Preparation
The layer surfaces are prepared to promote adhesion:
- Chemical etching – Creates micro-roughened surfaces for mechanical bonding. Common etchants include sulfuric acid, chromic acid, and plasma.
- Bonding films – Liquid or film adhesives applied to bonding surfaces increase adhesion. Common options are epoxies, acrylics, polyimides.
Layer Alignment and Layup
The separate layers are precisely aligned and stacked in the designed sequence:
- Registration accuracy is critical, especially for high-density interconnects and microvias. Typical tolerance is around 25-50μm.
- Automated optical alignment systems use fiducials for precision.
- Layer symmetry helps minimize misalignment by orienting layers identically.
Lamination
The prepared stack is laminated under heat and pressure:
- Press temperature typically ranges from 180-200°C.
- Applied pressure is generally 300-500 psi.
- Pressure and heat flow the adhesive films to bond the layers.
- Lamination cycle time ranges from 60-180 minutes depending on board thickness.
The combination of heat, pressure, and adhesive cure results in a solidly fused multilayer assembly. Good lamination is critical for interlayer bond strength and electrical connectivity.
Drilling PCB Holes
Holes are drilled through the laminated PCB to facilitate component mounting and electrical connections between layers. Key aspects of multilayer drilling include:
Hole Types
- Through-holes span entire board thickness for components leads and vias.
- Blind vias connect between intermediate layers.
- Buried vias are contained entirely within the board.
Drilling Equipment
- Mechanical drills use drill bits for versatility.
- Laser drills create small holes without contact.
- CNC drills allow automation with precision accuracy.
Hole Wall Quality
- The hole entrance and exit should be free of burrs, nicks, tearing.
- Maintaining hole cylindricity and avoiding barreling is critical.
- Smear from resin melting can interfere with metalization. Desmear processing may be required.
Registration
- Tight control over hole placement accuracy and alignment is necessary, especially for high density designs.
- Automated optical systems typically achieve registration within 0.05-0.10mm.
Clean, cylindrical, well-placed holes with precise alignment enable effective interconnect plating.
Plated Through Hole (PTH) Processing
PTHs provide electrical connectivity between layers in multilayer boards. Good plating quality is essential for conductivity. Key PTH processing steps include:
Via Preparation
- Deburring removes entrance/exit debris after drilling.
- Desmear eliminates resin smear using chemical or plasma etching.
- Activation deposits catalytic seeds for electroless plating.
Copper Plating
- Electroless copper initially deposits a thin coating.
- Electroplating rapidly builds up copper thickness to fill the hole.
- Plating time and current density are controlled for uniform thickness.
Hole Wall Testing
- Cross-sectioning and microscopy validates plating quality.
- Continuity testing confirms electrical conductivity through the hole.
Properly plated PTHs ensure robust connections between layers without shorting.
Layer Imaging and Etching
Printed circuit traces and features are formed on each layer through photolithographic imaging and etching:
Photoresist Application
- Liquid or dry film photoresist coats the copper surfaces
- Lamination ensures uniform resist thickness and adhesion.
Exposure
- The layer artwork pattern is precisely imaged onto the resist using UV radiation.
- Direct imaging machines control line width and registration accuracy.
Developing
- Chemicals dissolve the exposed (or unexposed) resist regions.
- The resist forms a mask with openings defining the traces and features.
Copper Etching
- Etchants like ferric chloride or ammonium persulfate remove exposed copper.
- Etching forms the isolated copper traces and patterns.
Resist Stripping
- The remaining photoresist mask is stripped away using solvents or plasma.
- This reveals the final copper layer circuit pattern.
The imaging and etching process is repeated for each conductive layer. Etch consistency and resolution help achieve fine features and tight tolerances.
Solder Masking
The solder mask primarily serves to protect exposed copper traces from oxidation and prevents solder bridges between pads during assembly. Key solder mask considerations include:
Mask Material
- Liquid photoimageable solder mask (LPSM) allows photopatterning.
- Dry film solder mask (DFSM) offers convenience and consistency.
- Reworkability is a major selection factor.
Application and Curing
- Screen printing, ink jetting, electrodeposition, or lamination apply the mask material.
- Thermosetting or UV curing solidifies the mask layer.
Imaging and Developing
- The solder mask layer is imaged to selectively expose the soldering pads.
- Uncured resin is developed away from the exposed areas.
Final Curing
- A hard thermal cure or UV exposure fully crosslinks the solder mask.
A properly patterned, cured solder mask prevents shorts while allowing soldering access.
Surface Finishes
Surface metal platings are applied to the exposed soldering pads and contact fingers to enhance solderability and prevent oxidation:
Common Finishes
- Organic Solderability Preservative (OSP) offers a temporary protective coating.
- Immersion Silver provides excellent shelf life and solderability.
- Electroless Nickel Immersion Gold (ENIG) combines corrosion resistance with wire bondability.
Application
- Finishes are applied using electrolytic or electroless plating processes.
- The thickness ranges from just a few micro-inches for OSP to 30+ micro-inches for ENIG.
Functionality
- Finishes must withstand the soldering process temperature and be removable by solder.
- They also prevent copper oxidation which can inhibit soldering.
Choosing the optimal finish is driven by assembly process, reliability, and performance requirements.
Final Testing and Inspection
Prior to shipment, PCBs undergo a battery of final tests and inspection to verify quality and functionality:
In-Circuit Testing
- Tests for opens, shorts, and component placement.
- Flying probe and bed-of-nails fixtures access test points.
- Boundary scan and related techniques test assembled boards.
Automated Optical Inspection
- AOI systems check assembled boards for defects and tolerances.
- Common tests include solder bridging, missing solder, lifted leads, etc.
Electrical Testing
- Continuity testing validates connections between points.
- Impedance and high-speed signal integrity are verified.
- Overall PCB performance is validated.
Quality Inspection
- Visual inspection checks for blemishes, scratches, spots, etc.
- Dimensional measurements confirm board thickness, features, etc.
Passed boards then proceed to packaging and shipment to customers. Thorough testing prevents defective PCBs from reaching assembly.
Key Factors for Quality Multilayer PCBs
Manufacturing multilayer boards is a complex, multi-step engineering process involving many variables. Some of the key factors for consistently producing quality PCBs include:
- Stringent process controls for dimensional stability
- Precision alignment and registration systems
- Minimizing variation in material properties
- Investing in advanced PCB equipment and infrastructure
- Rigorous product testing and inspection at all stages
- Strong focus on continuous improvement and optimization
- Maintaining tightly controlled environmental conditions
- Implementing automation for improved repeatability
- Hiring experienced engineering and technician staff
- Fostering a culture of quality and attention to detail
Multilayer PCB manufacturing demands substantial specialized expertise and capabilities. Partnering with a high-quality supplier greatly enables success in bringing complex multilayer designs to fruition reliably.
Frequently Asked Questions
Here are some common FAQs about multilayer PCB manufacturing:
Q: How many layers can be accommodated in multilayer PCBs?
A: The number of layers that can be incorporated in a multilayer board ranges from 4 layers up to around 60 layers for the most complex designs. 4-16 layers is the most common range.
Q: What are some key differences between double-sided, multilayer, and HDI PCBs?
A: Double-sided boards have conductors on both outer surfaces. Multilayers have 3 or more inner metal layers. HDI refers to boards with finer lines/spaces supporting higher density interconnections.
Q: What are the typical minimum trace width and spacing for multilayer boards?
A: Typical multilayer PCB trace/space is around 4-5 mils (.004″). More advanced processes support 2 mil lines/spaces. Microvias allow further density increases.
Q: How are buried and blind vias formed in multilayer boards?
A: Buried and blind vias are formed by sequentially laminating sub-composites with drilled vias. Aligned lamination electrically interconnects the sub-composite vias.
Q: What are thermal vias? Where are they used?
A: Thermal vias are drilled holes, often filled or plated, that conduct heat vertically through the layers. They are used to dissipate heat from high power components.


0 Comments