Introduction
A circuit board prototype is an initial working model of a printed circuit board design created for validation and testing purposes during product development. Prototyping circuit boards is a crucial step before committing to full-scale production.
This guide will walk through the key steps involved in building a circuit board prototype:
- Design and layout
- Fabrication
- Component selection
- Assembly
- Testing and debugging
By following these steps, you can create a prototype board that enables functional testing and verification of an electronic product design.
Design and Layout

The first step is creating the circuit schematic and PCB layout for your board using EDA software such as Eagle, Altium or OrCad.
- Focus on implementing the core functionality rather than optimizations.
- Follow good design for manufacturability (DFM) practices to ensure the layout can be reliably manufactured.
- Include test points and interfaces to facilitate debugging like headers and test pads.
For quick design iterations, you can use prototyping-friendly layouts features like oversized traces, fewer layers, and relaxed spacing rules.
Fabrication
Once you finalize the board layout, the Gerber files are sent for PCB fabrication to produce the bare boards. For prototypes:
- Start with small quantities like 2-5 boards.
- Use fast fabrication options with 1-2 week turnaround.
- Stick to simpler board materials like FR-4.
- Omit any unnecessary finishing steps like solder mask.
There are many low-cost, quick-turn PCB fabrication services ideal for prototype boards.
Component Selection
Next, assemble a bill of materials (BOM) listing all the required components.
- Standardize on common, easily available component values and packages.
- Use leaded components for easy rework.
- Include IC sockets for easy replacement.
- Order extra quantities for possible rework or failures.
Keep the BOM simple during prototyping before optimizing later.
Assembly
There are several assembly options for building the board:
Hand Assembly
- Feasible for 1-2 boards.
- Provides maximum control over process.
- Requires equipment and skills.
Professional Assembly
- Efficient assembly of medium quantities.
- Automated process ensures consistency.
- Specialized skills and tooling.
Evaluate tradeoffs to choose whether hand assembly or outsourced professional assembly is suitable, based on quantities needed and complexity.
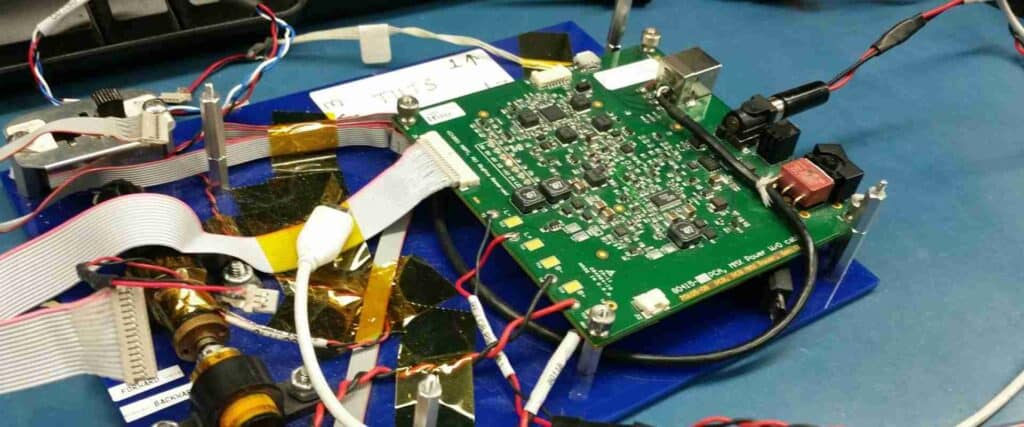
Testing and Debugging
Once assembled, the prototype board needs to be tested:
- Perform basic continuity checks to verify assembly integrity.
- Functionally test key circuits and components.
- Compare performance metrics to simulations and expected results.
- Use oscilloscope probes on test points to analyze signals.
- Debug and resolve any issues by reworking components or modifying PCB.
Thoroughly testing the prototype and fixing any problems is essential before design finalization.
Documentation
Carefully document the prototyping process including:
- Take photos and notes during assembly and testing.
- Record performance characteristics and metrics.
- Document any changes made to the BOM or PCB.
- Note down any lessons learned and design improvement ideas.
Robust documentation helps apply learnings to the next design iteration.
Moving from Prototype to Production
Once the circuit board design is successfully prototyped and validated, it is ready to transition to production. This involves:
- Finalizing schematics, layout, BOM, and assembly process based on prototyping feedback.
- Modeling and simulations to optimize performance and costs.
- Creating test procedures to ensure quality and reliability.
- Qualifying and sourcing all components for volume production.
- Selecting manufacturing partners for fabrication and assembly.
With careful prototyping, the production design will benefit from all the practical insights gained.
Key Benefits of Prototyping
Here are some of the biggest advantages of building a circuit board prototype before full production:
- Test functionality early to identify and rectify issues.
- Refine schematics and layout based on real-world feedback.
- Optimally select components based on actual performance.
- Gain assembly process learnings before ramping production.
- Evaluate product’s real-world usability.
- Accelerate the overall development process.
In essence, prototyping allows validating the design and “de-risking” it before large investments in tooling and volume production.
Frequently Asked Questions
How many prototype boards should be built?
2-3 boards are sufficient for simple circuits. Complex boards may need 5-10 units for comprehensive testing.
How much does it cost to build prototypes?
Cost varies based on complexity. $200 – $2000 per board for fabrication and assembly is typical.
Can solderless breadboards be used for quick prototyping?
Breadboards are suitable for initial proof-of-concepts but PCB prototypes offer better electrical performance reflecting the final product.
What are some key prototyping troubleshooting tips?
Check power connections, component polarity, pinouts, solder joints, faulty components, PCB damage or shorts. Follow systematic debug processes.
How do I determine if a PCB needs to be redesigned after prototyping?
If critical design flaws are found that require layout changes or significantly impact functionality or manufacturability. Also if testing reveals areas for major performance improvements.
In summary, building circuit board prototypes requires rigorous planning and execution across design, fabrication, assembly, and testing stages but enables huge benefits for product development. Get your prototypes right by following best practices.


0 Comments